

Green screens have made cinema what it is today. It’s not some overtly expensive or extraordinary tech; if you think about it, it’s actually a clever trick: isolate the subject, drop in a new background, and it looks like the real deal.
Most filmmakers and creators begin at home, without the luxury of big studio setups — no spacious soundstages, no large budgets. Yet that doesn’t mean you’re limited. With a bit of creativity, you can still build a green screen that fits the scale of your project, without the expense or constraints of renting a professional studio.
In this guide, you won’t just learn how to create a green screen; you’ll learn a simple hack that’ll serve your filmmaking for years to come.

Can You Make Videos Without a Green Screen?
In short, yes. To elaborate, many video editing tools now come with an AI Background Remover feature. In essence, it works the same way as chroma keying or a green screen. That is by separating the subject from the background and swapping in one of your choices.
In theory, this technology works across many different features, like video watermark remover or remove object from video, but several background removal technologies vary across the platforms and tools available today, such as:
Depth-sensing hardware: Tools like iPhone’s Portrait mode or webcams with depth sensors use depth data instead of color-keying, so they don’t need a solid-color backdrop at all.
OBS with AI plugins: OBS Studio has plugins (like Background Removal by @royshil, powered by NVIDIA or MediaPipe models) that handle real-time removal during live streaming or recording. Works great if you’re doing live content.
Rotoscoping (manual/semi-automatic): For high-precision work, tools like After Effects’ Roto Brush track the subject frame-by-frame without needing a green screen at all. This means more control, but more effort.
Semantic Segmentation: Apps and online tools that remove the background use semantic segmentation, an AI model trained to recognize and isolate a human subject from the background automatically, frame by frame, without any depth sensors or manual work.
What You Need to Make Videos Without a Green Screen
All you need to get started making videos without a green screen is a recording phone and an app featuring a background remover tool.
But here’s a quick checklist of things you must have while recording:
- A phone or a camera for recording
- Even lighting, preferably natural or bright light, so the subject is clear
- A simple recording area — if you plan to change the background, make sure the original isn’t too complicated to work with
- The AirBrush video background remover. You can install the app for free and test it right away to see how the video turns out
- A replacement or branded background saved, whether as a video or a photo
How to Create Professional Videos Without Green Screen Using Airbrush
AirBrush, while known as a photo editing tool, also caters to professionals looking for premium-grade results. Its background remover feature works on both video and photo by isolating the subject and adding a chroma key to the background.
The steps are as simple as they get. Unlike older methods, where you had to manually isolate the subject frame by frame, if you don’t have a green screen, all you need to do now is drag across the subject, and the AI identifies it for you. Or, if you’d rather skip that step entirely, you can go full auto and let the AI handle the whole thing.
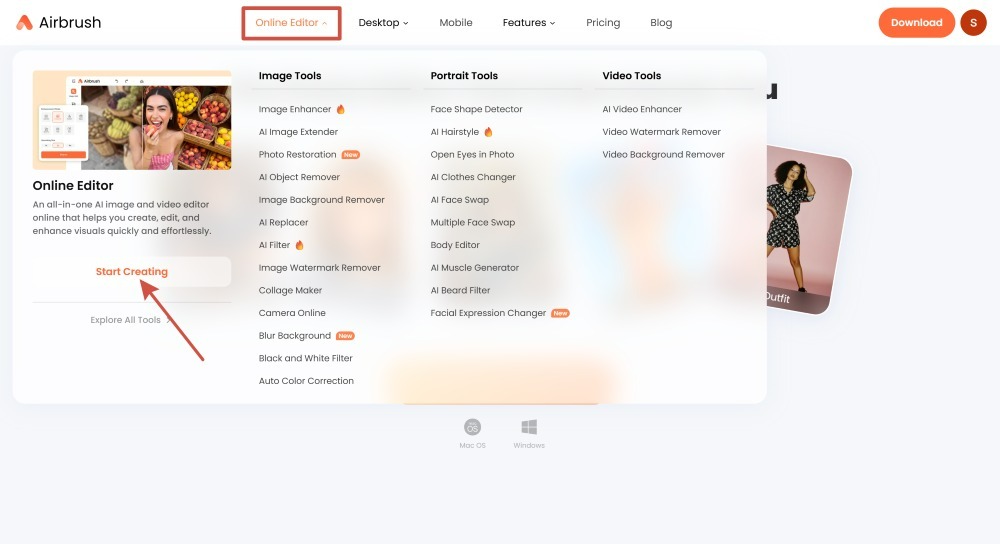
1. Go to the AirBrush editor
Head over to the AirBrush website and open the editor tool.
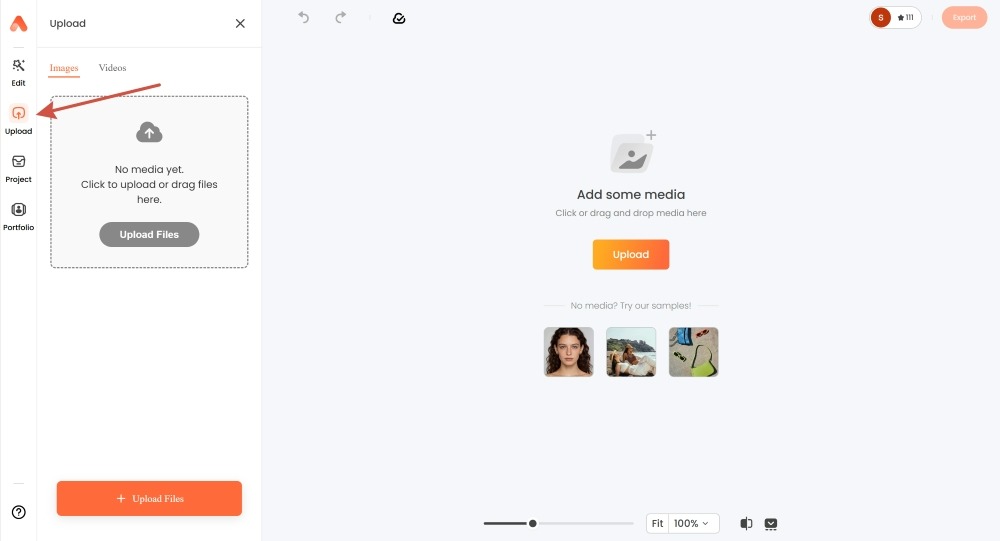
2. Click “Uploads” from the left toolbar
This is where you’ll bring in your footage. You’ll find it as one of the main tabs on the left-hand side of the workspace. Select “Videos,” then click “Upload Video” to choose the video file from your device. Give it a moment to upload, especially if it’s a longer or higher-resolution clip.
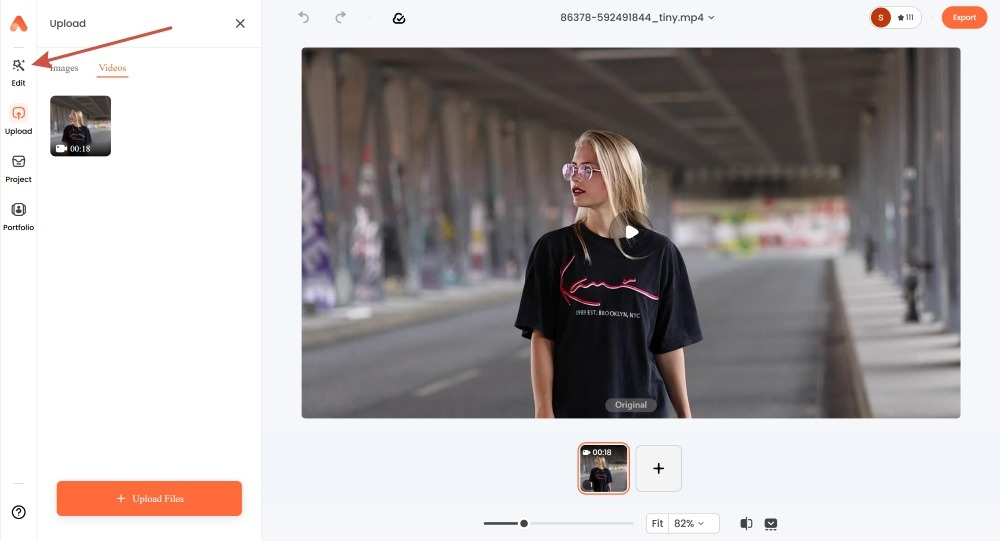
3. Select the video as it appears in the media tool
Once uploaded, your clip will show up in the media library within the editor. Click on it to bring it into your active project and get it ready for editing.
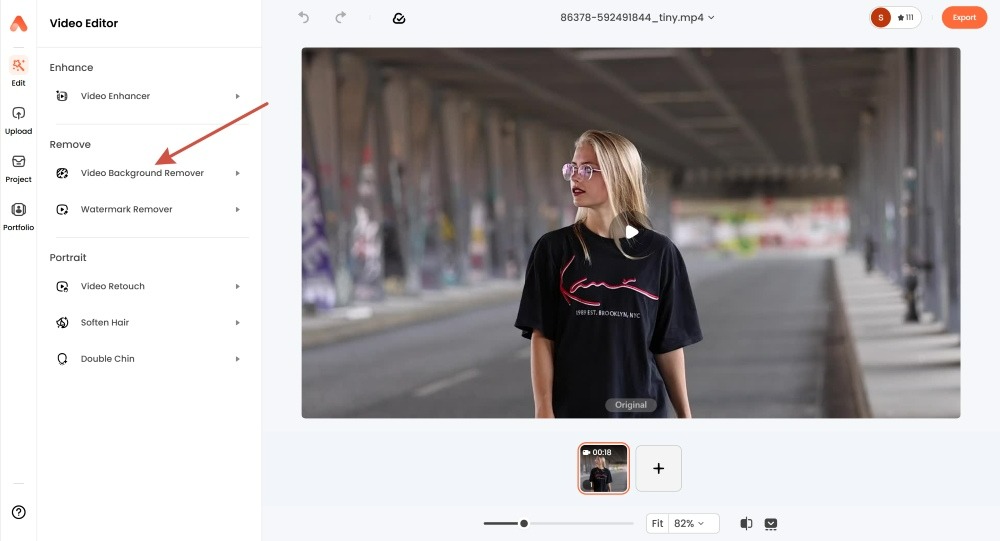
4. Click “Edit” on the left toolbar
This opens up the editing tools for your clip, where you can find all video adjustment features like Remove Background.
5. Turn on “Remove Background,” then click “Done”
The AI will automatically detect your subject and strip out the original background. In its place, it drops in a solid green screen. This is intentional, giving you a clean base to swap in any background you want next.
7. Click “Export” to save your video
Once you’re happy with the result, export the clip to your device. From here, it’s ready to use however you like. Post it directly, or bring it into another background if you want to customize it further.
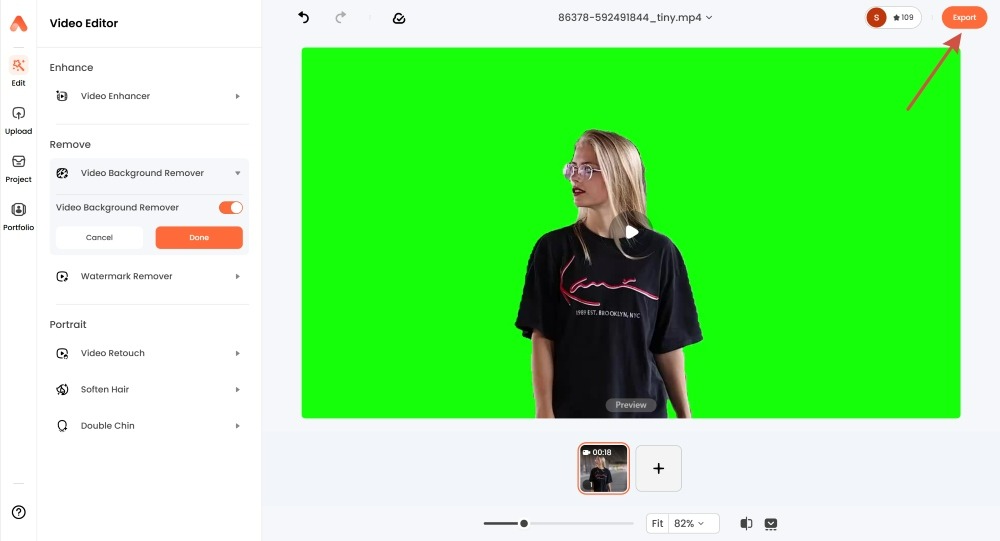
Once your subject is isolated on the green screen, you don’t have to stop there. You can bring that clip into any editing tool that supports chroma keying (including AirBrush itself, or apps like CapCut, InShot, or Premiere) and key out the green to drop in a background of your choice. This gives you full creative control over the final look, all without ever needing a physical green screen setup.
Tips for Creating Professional Videos Without a Green Screen
Before you set out to shoot your video, keep these tips in mind, as they will help you remove or change your background in the cleanest possible way:
- Light your subject evenly: Avoid harsh shadows or backlighting, as it will make it difficult for background remover tools to identify the subject.
- Keep the background simple: A plain wall or uncluttered space helps the AI isolate you faster and cleaner.
- Wear contrasting colors: Avoid clothing that matches your background too closely.
- Stay still when possible: You move too fast; you will confuse AI, and it won’t be as efficient in isolating the subject in each frame.
- Avoid flyaway hair or loose strands: Fine details like hair can be tricky for AI to cut around cleanly.
- Don’t shoot against reflective or glass surfaces: Reflections can trip up the subject detection.
Conclusion
We’re currently sitting in the most video-driven age of our lives. Every teenager has a TikTok account and has experimented with dance videos, GRWMs, or just going on a random rant. With the right idea, almost anyone can become the next successful content creator, and AI is making that process easier. Background removal is just one part of what these tools can now do.